Remember those fun folded notes we passed around in school? With Valentine’s Day approaching, why not revive this nostalgic tradition and surprise your loved one with a creatively folded love note? This guide will teach you how to fold origami notes, perfect for expressing your affection in a unique and memorable way.
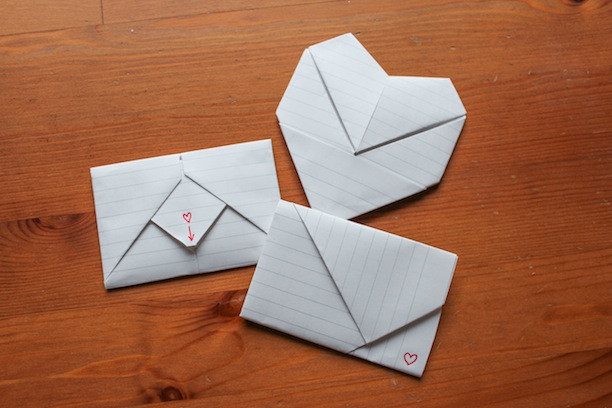 alt text: Example of different folded origami love notes.
Simple and Sweet: The Write & Tuck Fold
This easy fold is perfect for beginners. Grab some notebook paper and a pen to get started.
- Fold the Corner: Fold the top right corner of the paper diagonally to the left edge, creating a triangle.
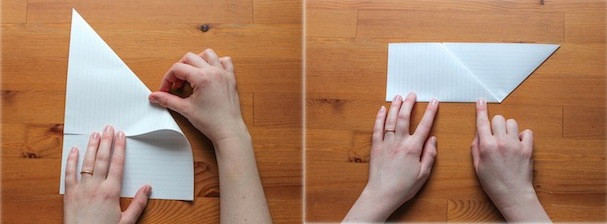 alt text: Step 1 of the Write & Tuck fold, folding the top right corner to the left edge.
- Fold the Edge: Turn the paper sideways and fold the right edge over to align with the left edge.
 alt text: Step 2 of the Write and Tuck Fold, folding the right edge to the left.
- Create the Pocket: Flip the paper over. Fold the bottom edge up about one-third of the way, then fold it up another one-third, creating a double fold.
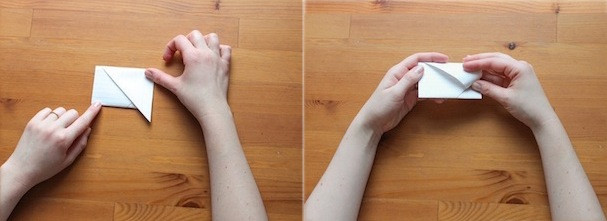 alt text: Step 3 of the Write & Tuck fold, creating a double fold at the bottom.
- Tuck and Crease: Flip the paper over again. Tuck the remaining bottom corner into the double fold to create a pocket. Crease all the folds firmly.
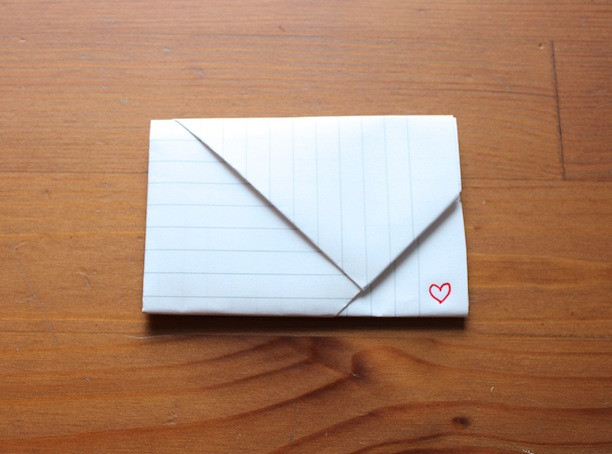 alt text: The finished Write & Tuck folded love note.
Fun and Flirty: The “Pull Here” Tab Fold
This fold adds a playful element to your love note.
-
Fold the Corners: Fold the top two corners of the paper inwards towards the center. Flip the paper vertically and repeat on the other side. Fold each side edge inwards towards the center.
-
Shape the Tab: Fold the two pointed ends at the bottom inwards towards the center. Flip the paper over and fold the bottom edge up about one-third of the way. Fold the remaining bottom edge up to meet the previous fold, creating a small rectangle.
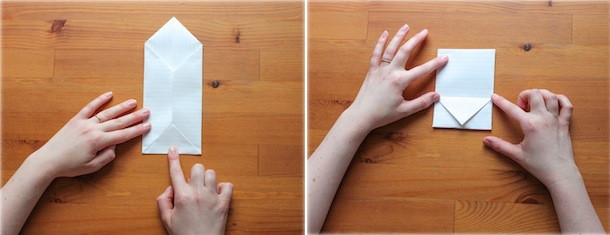 alt text: intermediate step in the pull here tab fold showing the paper folded into a rectangle.
- Tuck and Finish: Tuck the two pointed flaps at the bottom into the small side folds you created in the previous step.
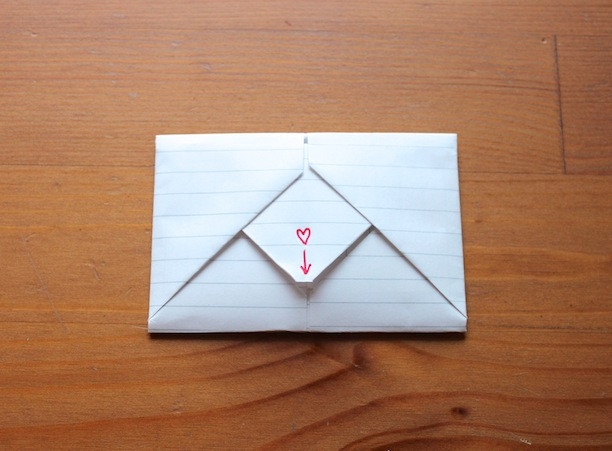 alt text: The completed Pull Here Tab folded love note.
Romantic Reveal: The Heart Fold
This classic fold transforms your note into a heart. The instructions are more intricate, but the result is worth the effort. Follow the detailed steps and accompanying images to achieve the perfect heart shape.
- Initial Creases: Fold the top two corners of the paper down to meet the opposite edges, creating diagonal creases. Unfold.
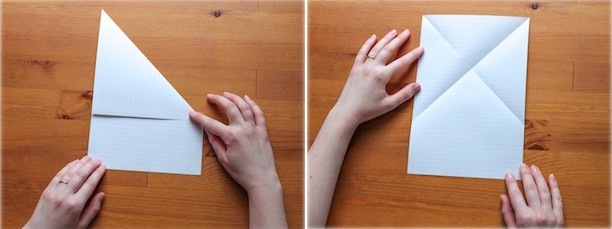 alt text: First step of the heart fold, creasing the top corners diagonally.
- Fold Down the Top: Fold the top half of the paper down along the horizontal crease created by the intersection of the diagonal creases you just made.
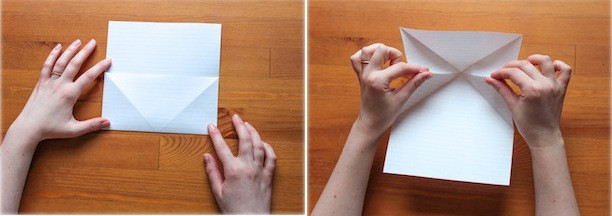 alt text: Second step of the heart fold, folding the top half of the paper down.
- Form a Triangle: Push the two side creases inwards, bringing them together to form a triangle shape. Fold the two bottom corners of the triangle upwards to meet the top point.
 alt text: Forming a triangle in the heart fold process.
- Fold the Edges and Bottom: Fold the side edges of the triangle inwards towards the center line. Fold the bottom edge upwards to meet the bottom of the diamond shape that has formed at the top.
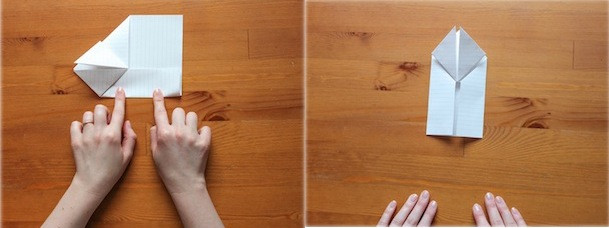 alt text: Folding the edges to the center in the heart fold.
- Create the Curves: Flip the paper over. Fold the top flap of the front triangle downwards. Fold the two bottom points upwards, tucking them under the diamond shape. Fold the left and right points of the diamond diagonally downwards, tucking them into the flaps created earlier.
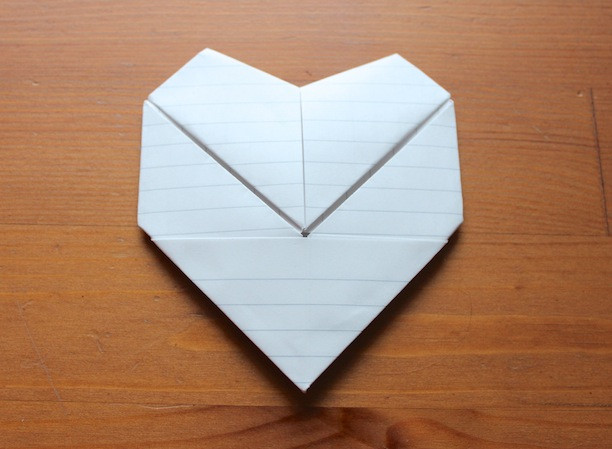 alt text: The finished heart-shaped folded love note.
Now you have three different ways to fold a love note! Choose your favorite and let your creativity shine. Happy Valentine’s Day!
